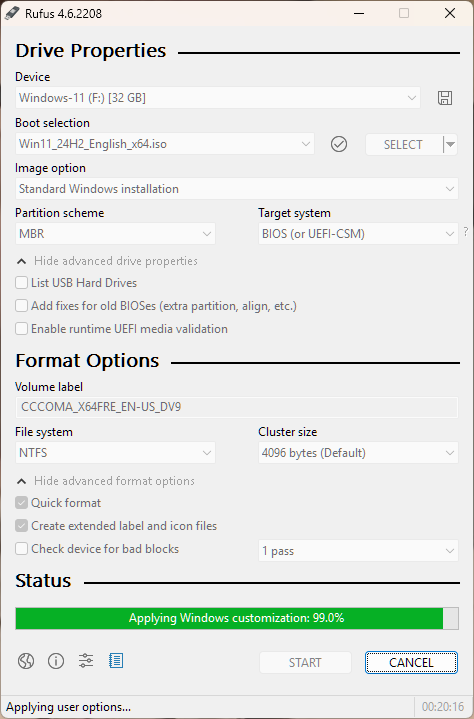
When Microsoft released Windows 11 I had to research how to install it on our public charity’s lab computers because they do not have TPM hardware, which is required by Windows 11 as a default condition of installing. Reading the Microsoft support forums showed Microsoft’s recommendation to use a utility named RUFUS (download from https://rufus.ie/en/) to handle the install. It worked and our lab computers perform very nicely under Windows 11 Pro – as fast as most computers that can be purchased retail today. Their configuration is 6-core AMD processors running at 3.5GHz on an ASUS main board with 8 GB RAM. Here is the long and short of using RUFUS:
-
- Buy your license for Windows 11. https://www.microsoft.com/en-us/software-download/windows11 or where ever.
- Download your Windows 11 .iso file and key from Microsoft. You will need the key as or after Windows 11 is installed.
- Download Rufus from https://rufus.ie/en/
- Unzip Rufus – it is one .exe file.
- Insert a USB memory stick into your computer’s USB jack
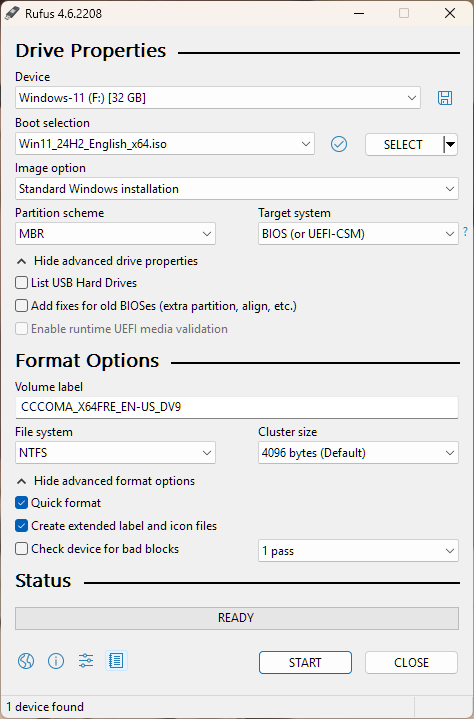
- Run rufus-4.6.exe (version# may change)
- A dialog box appears. Click SELECT to browse to your downloaded Windows 11 .iso file. If your computer can not handle UEFI then use MBR not GPT partition type. Fill in the other blanks as needed. Click START.
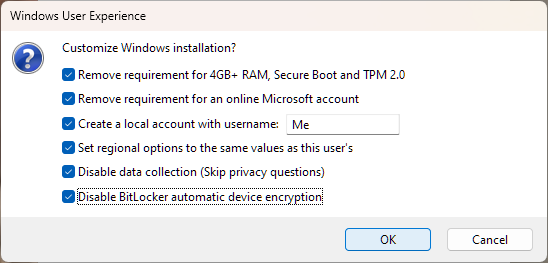
- A dialog box appears. Change it as needed for your situation. Click OK.
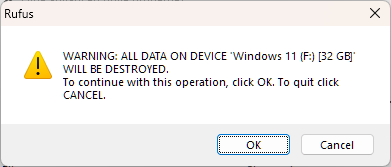
- A warning dialog box appears. NOTE: the memory stick is about to be erased. Everything on the memory stick will be erased. Click OK.
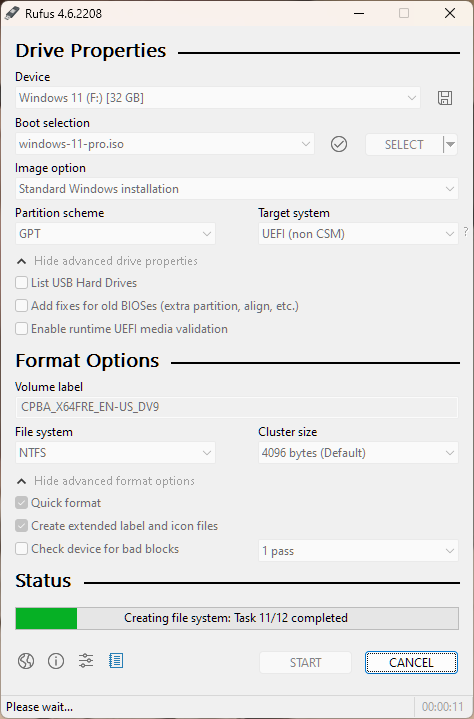
- Wait for Rufus to finish preparing your USB memory stick to install Windows 11., then eject / safely remove the memory stick.
- Insert your USB memory stick into the computer on which you want to install Windows 11 and boot the computer from the USB memory stick. Follow the prompts as usual to install Windows. Enter the Windows key when prompted.

